Working with Subsystems

The Work with Subsystems command, WRKSBS, brings up with Work with Subsystems list screen. By entering 4 next to the subsystem name  in the option column and pressing Enter, we can end that subsystem. Entering 5 instead and pressing Enter display’s the subsystem’s description, and entering 8 lets us work with that subsystem’s jobs.

It isn’t difficult to create new subsystems for batch, interactive, or server purposes. A subsystem definition consists of three major components, the subsystem attributes, the work entries, and the routing entries.

The subsystem description, *SBSD, is an object used to describe a subsystem and to control what tasks the subsystem can perform. Each time a subsystem is created, a subsystem description is required.

Subsystem attributes comprise the general definition of the subsystem and control its main storage allocations. This general definition includes the subsystem name, library, text description, the maximum number of jobs allowed to run on the subsystem, and the storage pool definitions. Main storage on the IBM i is divided into a number of different storage pools. The storage pool definition has a subsystem either share an existing pool of main storage, establish a private pool of main storage, or both. A private pool is created and named by the subsystem description, and it can only support one subsystem.

The Create Subsystem Description command, CRTSBSD, enables us to create a new subsystem description. Entering CRTSBSD and pressing Enter brings up the Create Subsystem Description screen. The first parameter is used to specify the qualified name of the subsystem description, which is the name of the library and the name of the subsystem itself. This parameter, SBSD, takes *CURLIB by default as the library. The second parameter, POOLS, is used to specify the storage pools used by the subsystem. The activity level for a pool indicates how many jobs on the subsystem can be run in that pool at a given time.  A maximum number of 10 storage pools can be assigned to the subsystem. The first pool is used to support the subsystem driver; for performance reasons, this pool should usually be *BASE.

The SBSD and POOLS parameters are the only required parameters when creating a new subsystem description. Thus, we can create a simple subsystem by issuing the command CRTSBSD SBSD(TESTSUB) POOLS((1 *BASE)), which creates a subsystem description in our current library named TESTSUB that uses the shared *BASE storage pool. We can then issue the command DSPSBSD SBSD(TESTSUB) to view the attributes of the TESTSUB subsystem description. At the top of the screen we will seen the name, library, and status of this subsystem description; as we can easily see, the subsystem’s status is INACTIVE.

The Maximum Jobs parameter, MAXJOBS, specifies the maximum number of jobs that can be run on the subsystem at any one time. We can put *NOMAX here to indicate that there is no limit to the number of jobs that can be run at once on the subsystem. In practice, it is often good to set a number here, to prevent the subsystem from potentially being flooded. Note the difference between Maximum Jobs and the Activity Level, the Maximum Jobs parameter specifies how many jobs are in the system, whereas Activity Level specifies how many of those jobs are actually working at one time.

Finally, the Text parameter, TEXT, enables us to give a text description for the subsystem. Both the MAXJOBS and TEXT parameters are optional; by default, MAXJOBS is set to *NOMAX and TEXT is set to *BLANK.

Let’s create a second subsystem named TESTSUB2. We will give this subsystem two storage pools, and set the maximum number of jobs to 15. Issuing the command CRTSBSD SBSD(TESTSUB2) POOLS((1 *BASE) (2 65536 8)) MAXJOBS(15) creates our second subsystem, with a secondary storage pool of 64K that can run eight jobs at once. Entering the command DSPSBSD SBSD(TESTSUB2) displays the subsystem description, which, like TESTSUB1, is inactive. Selecting option 2 will display the storage pools, of which there are two, just as we defined.

Subsystems do not become active until they are started. A subsystem definition is, in the end, only a definition of what resources should be allocated; to allocate the resources, we must activate the subsystem. We can activate a subsystem using the Start Subsystem command, STRSBS. The only parameter that must be specified is the subsystem to start, SBSD. If the subsystem is in a library that is in our library list, we can can omit the library name, otherwise we should include the library name before the name of the subsystem.

Let’s start our TESTSUB subsystem by issuing the command STRSBS SBSD(TESTSUB). Entering the command DSPSBSD SBSD(TESTSUB) will then show us that the subsystem is active. Let’s also start the second subsystem we have defined, TESTSUB2, by entering the command STRSBS SBSD(TESTSUB2). Note that as both TESTSUB and TESTSUB2 were created in our current library, *CURLIB, which is part of our library list, we do not have to insert the library name.

Use the End Subsystem command, ENDSBS, to shut down a subsystem. Typing in ENDSBS at the command line, we can press F4 to prompt for parameters. The system will prompt us for the name of the subsystem we want to end, and whether we want a controlled end, signified by *CNTRLD, or an immediate end, signified by *IMMED.

A controlled end, *CNTRLD, allows all active jobs to continue for a set period defined in seconds in the DELAY parameter. We can change the value of the Delay Time parameter, DELAY, to a given number of seconds, or, alternately, we can specify no maximum with *NOLIMIT, which lets active jobs continue indefinitely.

An immediate end to a subsystem, *IMMED, forces the system to take drastic measures to end jobs. If the jobs were updating files, especially keyed files, the IBM i operating system may have to repair the files the next time we IPL, which could incur a significant time penalty.

Let’s end the TESTSUB subsystem via the command ENDSBS SBS(TESTSUB) OPTION(*IMMED); this command will immediately shut down the TESTSUB subsystem. We can use the *IMMED option, as we know that there are no jobs being run in the TESTSUB subsystem. We’ll end the TESTSUB2 subsystem using a controlled end and a time delay of 180 seconds by issuing the command ENDSBS SBS(TESTSUB2) OPTION(*CNTRLD) DELAY(180).

We can also use the End Subsystem Option parameter, ENDSBSOPT, to improve the performance of ending subsystems. If we specify ENDSBSOPT(*NOJOBLOG), the subsystem will end without producing a job log for every job that was running in the subsystem, which can potentially save system resources. If we specify ENDSBSOPT(*CHGPTY *CHGTSL), the run priority and time slice for all jobs in the subsystem that end will be modified so as to consume less system resources than jobs that are still running in other subsystems.

All parameters specified on the Create Subsystem Description screen may be modified with the Change Subsystem Description command, CHGSBSD. Let’s start by issuing the command CGHSBSD SBSD(*CURLIB/TESTSUB) MAXJOBS(10); this command will alter the TESTSUB subsystem to have a maximum number of 10 jobs. We can then enter DSPSBSD SBDSD(TESTSUB) and then select option 1 to verify that the maximum number of jobs has been altered. Next, let’s modify the TESTSUB2 subsystem so that it has a third storage pool with approximately 32K of storage and an activity level of 5. To do this, we issue the command CHGSBSD SBSD(TESTSUB2) POOLS( (3 32000 5)).

We can then start up both subsystems by issuing the commands STRSBS SBSD(TESTSUB) and STRSBS SBSD(TESTSUB2). Next, let’s end the TESTSUB subsystem immediately and without writing job logs by entering the command ENDSBS SBS(TESTSUB) OPTION(*IMMED) ENDSBSOPT(*NOJOBLOG). Then, let’s end the TESTSUB2 subsystem with a six minute delay, no job log, and with jobs that will compete less aggressively for processor cycles than jobs running in other subsystems. To do this, enter the command ENDSBS SBS(TESTSUB2) OPTION(*CNTRLD) DELAY(360) ENDSBSOPT(*NOJOBLOG *CHGPTY *CHGTSL).

Finally, we need to be able to remove subsystem descriptions that we no longer need. To delete a subsystem description, we use the Delete Subsystem Description command, DLTSBSD. To delete TESTSUB and TESTSUB2, we issue the commands DLTSBSD SBSD(TESTSUB) and DLTSBSD SBSD(TESTSUB2). Please be aware that the associated subsystem must be inactive before it is deleted.

Wanting to get the most out of your IBM i investment? Take a look atwww.laservault.com, the friendly IBM backup solution.
Working with Subsystems

The Controlling Subsystem

There are two subsystem controlling configurations supplied by IBM, QBASE and QCTL. The subsystem configuration the IBM i employs when the system is started is determined by the Controlling Subsystem system value, QCTLSBSD. To discover which subsystem we are using on startup, issue the command DSPSYSVAL SYSVAL(QCTLSBSD).

By default, most work is carried out by QBASE, as the IBM i is initially set up with QBASE as the controlling subsystem. The IBM i is also  shipped with an alternative controlling subsystem, QCTL. To view the subsystem description for QCTL, we enter the command DSPSBSD SBSD(QCTL), and then select option 30 from the subsequent menu to view all of the attributes, definitions, and entries for the subsystem. Note that the only storage pool defined for QCTL is *BASE; likewise, QCTL has only one job queue, which is named QCTL.

The QCTL subsystem starts four main system-supplied subsystems, QINTER, QBATCH, QCMN, and QSPL. The QINTER subsystem is for interactive jobs, QBATCH is for batch jobs, QCMN is for communication jobs, and QSPL is for spooling jobs.

We can change the controlling subsystem to QCTL by entering the command CHGSYSVAL SYSVAL(QCTLSBSD) VALUE(‘QCTL QSYS’). The change, however, will not take effect until after the next IPL. Just changing the system value will not automatically make the controlling subsystem switch from QBASE to QCTL. To complete the change, we must power down and restart the system. We can restart the system via the PWRDWNSYS RESTART(*YES) command.

QBASE and QCTL both start three basic subsystems for running server jobs, QSYSWRK, QUSRWRK, and QSERVER. The QSYSWRK subsystem is for server work not done on behalf of a specific user, the USRWRK subsystem is for user work, and the QSERVER subsystem is for file-serving work only. This set of jobs is started by the QSTRUPJD job; however, when started from QCTL, the additional subsystems QBATCH, QINTER, QCMN, and QSPL are also started.

During the system start, a CL program is usually called that starts all of the needed subsystems. The controlling subsystem, whether it is QBASE or QCTL, submits a job that runs the startup program.

The system value QSTRUPPGM contains the qualified name of the startup program. We can display the name of the startup program using the Display System Value command, DSPSYSVAL, by entering DSPSYSVAL SYSVAL(QSTRUPPGM).

If we change this system value, the IBM i will execute a different program during IPL. We can change this system value to reference any program name or else *NONE. The IBM i system ships with a program called QSTRUP located in the QSYS library that can be used either as is, or it can be tailored to fit our specific needs.

As an example, let’s change the system so that the controlling subsystem no longer calls a startup program. To do this, we issue the command CHGSYSVAL SYSVAL(QSTRUPPGM) VALUE(*NONE). We can then use the DSPSYSVAL command to verify that the change has been made. Next, let’s change the startup program to the default QSTRUP program with the command CHGSYSVAL SYSVAL(QSTRUPPGM) VALUE(‘QSTRUP QSYS’).

We can also make changes to the QSTRUPPGM system value using the Work with System Values command, WRKSYSVAL. Issuing the command WRKSYSVAL SYSVAL(QSTRUPPGM) brings up a list of system values that only contains the QSTRUPPGM system value. We can then select option 2 to change the system value or option 5 to simply display it.

Wanting to get the most out of your IBM i investment? Take a look at www.laservault.com, the fast and frugal IBM backup solution.

The Controlling Subsystem

IPL-related System Values

Starting an IBM i is referred to as an initial program load, abbreviated IPL. There are three types of IPL that can be performed. The first type is an unattended IPL, which does not require an operator or any other user to be present. An unattended IPL uses the default IPL and system options to start the system. We can view the default IPL options using the Display IPL attributes command, DSPIPLA. The second type of IPL is the attended IPL, which requires an operator to be present. During an attended IPL, certain system options can be modified during the IPL process.The third type is an automatic IPL, which is similar to an unattended IPL, but occurs as a result of special circumstances, such as a power failure, or a remote IPL.

There are a number of system values that determine the IPL process.

The QIPLSTS system value describes the manner in which the system performed the last IPL. This value cannot be changed; it can only be displayed. To view this value, enter the command DSPSYSVAL SYSVAL(QIPLSTS).

The QIPLTYPE system value defines the type of IPL the system will perform when the partition is powered on manually during a normal IPL. If QIPLTYPE is set to 0, the system will perform an unattended IPL. If QIPLTYPE is set to 1, the system will perform an attended IPL with dedicated service tools. This option is useful when performing an upgrade or maybe when attempting to diagnose a problem. The third option is 2, which is an attended IPL in debug mode. This mode leaves the controller QCTL and device QCONSOLE varied on after an IPL. QIPLTYPE should really be set to 2 only at the direction of an IBM support technician. The default value for QIPLTYPE is 0.

The QABNORMSW system value indicates how the system last ended. This system value can be either a 0, indicating the system ended normally, or 1, indicating that the system ended abnormally. To view how the previous ending was handled, enter the command DSPSYSVAL SYSVAL(QABNORMSW).

The QRMTIPL system value determines whether or not a remote system can start the IBM i. Enter DSPSYSVAL SYSVAL(QRMTIPL) to display the value set for this system value. A value of 0 indicates that a remote system cannot start the IBM i, and a value of 1 indicates that a remote system can start the IBM i. Note that even if QRMTIPL is set to 1, a remote system can only restart the IBM i if it is powered down.

The QPWRRSTIPL system value determines if the system will automatically restart itself after a power failure. If QPWRRSTIPL is set to 1, then the system will restart itself; if it is set to 0, then the system will not restart itself.

The QPWRDWNLMT system value controls how long the system waits for jobs to finish when executing the PWRDWNSYS OPTION(*IMMED) command. We can check this value by issuing the command DSPSYSVAL SYSVAL(QPWTDWNLMT). The default for this system value is 600 seconds, which is 10 minutes. Note that if jobs are still executing when this time interval expires, the system will perform an abnormal system termination, and set QABNORMSW to 1.

The QUPSDLYTIM system value controls the length of time the system will wait before saving main storage and powering down the system in the event of a power failure. The default value is *CALC, which means that the wait time is calculated based on the system configuration. Note that leaving QUPSDLYTIM set to *CALC may defeat the whole purpose of having a UPS, as the system will essentially begin a controlled shutdown after a short fixed interval delay, typically 200 seconds.

The QIPLDATTIM system value determines the date and time when the system will IPL itself automatically. To display when, if ever, the system is scheduled for an automatic IPL, enter the command DSPSYSVAL SYSVAL(QIPLDATTIM). The default value for QIPLDATTIM is *NONE. The QIPLDATTIM system value will have the system perform an IPL if it is in a shutdown state. We can IPL the system automatically at a specified date and time by setting the system value QIPLDATTIM to a specific date and time.

Generally speaking, it’s better to use the submenus found under Power On and Off Tasks menu to define the QIPLDATTIM system value. To access the Power On and Off Tasks menu, issue the GO POWER command.

The controlling subsystem stays active even when all other subsystems are shut down for backups. The only time the controlling subsystem is shut down is when a PWRDWNSYS command has been successfully completed. QCTLSBSD contains the qualified name of the controlling subsystem description.

The initial value for QCTLSBSD is QBASE, which is more than adequate for smaller, less complex systems. With this setup, practically all work, including interactive and batch jobs, is performed by the QBASE subsystem.

Wanting to get the most out of your IBM i investment? Take a look at www.laservault.com, the friendly IBM backup solution.

IPL-related System Values

Creating, Changing, and Deleting Libraries

Creating a library is easy. To create a library, we use the Create Library command, CRTLIB. Alternately, we can enter the GO LIBRARY command to go to the Libraries menu, and enter 2 to create a library.

There are three main parameters for the CRTLIB command, LIB, TYPE, and TEXT. The LIB parameter accepts the name we want to give the library. We should note here that whatever name we decide on ought not to begin with the letter Q.  The TYPE parameter can accept one of two types. The *TEST type indicates that the library will only contain test objects. A *TEST library does not protect its database files during debugging sessions. Production libraries, *PROD, can be protected from updates during debugging sessions. The IBM i system assumes TYPE(*PROD) by default. The TEXT parameter is used to give the library a text description, which we should enclose in single quotation marks. The description should be no more than 50 characters.

As an example, we could create a library called EXMPL by entering the command CRTLIB LIB(EXMPL) TEXT(‘an example library’). If the command is executed successfully, we will see the message “Library EXMPL Created” at the bottom of our screen. We can then verify that the library has been created by issuing the command DSPLIB LIB(EXMPL). We will then see that the library is of type *PROD, since that is the default type, and has 0 objects in it. We can also see a field labeled Create Authority. The Create Authority attribute, CRTAUT, specifies the default public authority that all objects in the library will have. The *SYSVAL parameter indicates that the QCRTAUT system value should be used to define the default public authority for new objects in the library.

To display the QCRTAUT system value, issue the command DSPSYSVAL SYSVAL(QCRTAUT). The QCRTAUT system value can have one of four possible values; *ALL, which means that the public can do anything with new objects in the library; *CHANGE, meaning that the public can modify new objects; *USE, which means the public may use, but not change, new objects; and *EXCLUDE, which means the public is not allowed to use new objects. The *CHANGE value is the default for the system value QCRTAUT when the IBM i is first set up.

We can use the four defined system authorities, *ALL, *CHANGE, *USE, and *EXCLUDE, as parameters for the CRTAUT parameter. If no specific authority is indicated, then the default of *SYSVAL is used.

Let’s create a second library named EXMPL2 that grants users all authority over newly created objects in the library. To do this, we issue the command CRTLIB LIB(EXMPL2) CRTAUT(*ALL) TEXT(‘A second example library’). We can then view this library by entering the command DSPLIB LIB(EXMPL2). We can list the two libraries we have just created by issuing the command WRKLIB LIB(EXMPL*).

We can use the WRKLIB command to modify libraries that have already been created. Entering the command WRKLIB LIB(EXMPL) and then entering the number 2 in front of the library listing  will enable us to modify the attributes of the EXMPL library. We can, for example, change the EXMPL library to a test library by entering *TEST in the field for the Library type attribute. After we press Enter, we can hit the F5 key to update the changes in the display.

We can modify a library directly using the Change Library command, CHGLIB. The CHGLIB command can be used to modify the library’s type attribute, its text description, its default authority value, and finally its default object auditing value.  The CHGLIB has one required parameter, the LIB parameter that specifies the library to be changed. We can then use the TYPE, TEXT, and CRTAUT parameters to modify the corresponding library attributes. For example, let’s change the TEXT value of EXMPL2 by entering the command CHGLIB LIB(EXMPL2) TEXT(‘here is some new text’). We can then use the Display Library Description command, DSPLIBD, to verify that the change has been made by issuing the command DSPLIBD LIB(EXMPL2).

We can delete a library with the Delete Library command, DLTLIB. The DLTLIB command requires one parameter, the name of the library to delete. Deleting a library not only deletes the library itself, it was also deletes all the objects within the library. Let’s delete the two libraries we have just created by entering the commands DLTLIB LIB(EXMPL) and DLTLIB LIB(EXMPL2).

All things being equal, we shouldn’t delete an IBM-supplied library with the Delete Library command, DLTLIB. Instead, if necessary, we can uninstall the library via the Licensed Programs menu, which we can reach by entering the command GO LICPGM.

Wanting to get the most out of your IBM i investment? Take a look atwww.laservault.com, the friendly IBM backup solution.
Creating, Changing, and Deleting Libraries

Displaying Libraries

On the IBM i, objects are grouped in special objects called libraries. Objects are found using libraries, and identified by name type. Libraries are themselves objects of type *LIB. Whenever an object is created, it goes into a library.

All objects are contained in libraries. A library is created to hold objects and functions as an index or directory for related objects. A library is itself an object, meaning that it can be created or copied just like any other object. This also means that we can use the Check Object command, CHKOBJ, to check for a library’s existence.

We should note here that libraries technically do not actually contain objects. Instead, they hold entries for objects that specify the type and authorization of the object, as well as the address pointer to the object itself.

There are three types of libraries: system libraries, product libraries, and user libraries.

A system library holds objects necessary for the operation of the IBM i system. The primary system library is QSYS, which contains objects that are part of the operating system.  The QHLPSYS library contains objects that provide system help information. We can verify the existence of the QHLPSYS library by issuing the command CHKOBJ OBJ(QHLPSYS). The QRECOVERY library contains objects needed during a recovery procedure. We can verify the existence of the QRECOVERY library by issuing the command CHKOBJ OBJ(QRECOVERY). The system user data library, QUSRSYS, contains various IBM-supplied objects needed for system functions as well as user message queues for holding messages.

Product libraries contain the licensed programs and other product objects. For example, the library QPDA contains objects associated with the IBM i Programming Development Manager. To check for the existence of QPDA, we can issue the command CHKOBJ OBJ(QPDA).

User libraries consist of libraries used by application programs to perform their functions. By default, the IBM i has the user libraries QGPL and QTEMP. The QGPL user library is a general purpose library that contains objects such as JOBQ, OUTQ, and MSGQ. The QTEMP library contains temporary objects used during the execution of jobs.

To display a list of objects contained in a library, we can use the Display Library command, DSPLIB. The Display Library command presents us with a list of objects and gives the type, the size, and a basic description of each object. For example, to view the contents of the QUSRSYS library, we would issue the command DSPLIB LIB(QUSRSYS). The QUSRSYS system library contains IBM journals and receivers, IBM output queues, and IBM message queues. Journal objects will be listed with type *JRN, journal receiver objects will be listed with type *JRNRCV, output queues will be listed with type *OUTQ, user indexes will have type *USRIDX, validation lists with type *VLDL, etc.

We can use the Work with Libraries command, WRKLIB, to list the libraries we have access to on the IBM i system. To display all of libraries, we issue the command WRKLIB LIB(*ALL); this will display a list of library names, along with their attributes, ASP device, and a brief text description of the library.  Putting the number 5 in the underscored Option section next to the library name and hitting Enter will display the contents of that library. If we just want to see a list of user libraries, we can issue the command WRKLIB LIB(*ALLUSR).

Wanting to get the most out of your IBM i investment? Take a look at www.laservault.com, the friendly IBM backup solution.
Displaying Libraries

Signing on to an IBM i

Historically, an IBM 5250 terminal was used to access an IBM i system, which was then known as an AS/400. Display terminals, sometimes called “dumb” terminals, did not and do not have any information processing capability; instead, it was a simple hardware component consisting of a screen for displaying data and a keyboard for accepting input.

Nowadays, everyday access to an IBM i system is accomplished from a PC via 5250 emulation software. MochaSoft’s 5250 emulation software, for example, is quite popular.

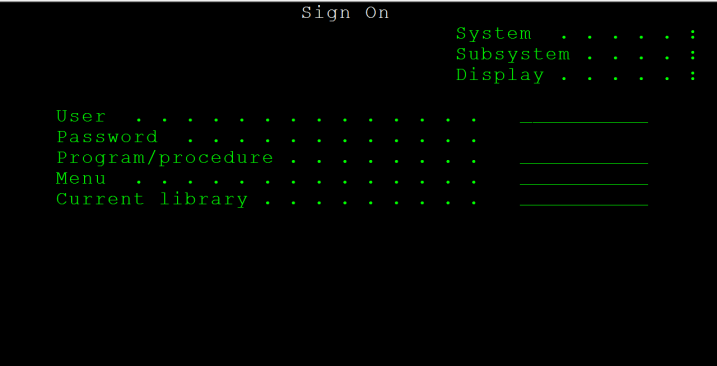
The IBM i is a secure system that requires sign on before any commands can be performed. The Sign On menu shows the current system, workstation, and subsystem. Beneath these three assigned values are five labelled data entry fields, the first two of which are the username and password. Note that it is not possible to see the information typed into the Password field.

The other three fields, Program/procedure, Menu, and Current library, can be restricted; this is a often a good idea from a security standpoint. To restrict access to these three fields, the sign-on screen can be modified. We can also set the Limit Capabilities field to *YES in individual user profiles to keep them from being able to specify values for these three fields.

Screenshot (296)

There are actually two standard sign-on screens for the IBM i. The first is QDSIGNON, which is used when the system is configured for standard 10-character passwords; the second is QDSIGNON2, which is used when the system has been set up to use 128-character passwords.

A user profile object is used to identify a particular use or group of users to the IBM i system. A user is known to an IBM i system by the user profile name. When initially assigned a username, the password is normally set to that same name.

An IBM i system has several predefined user profiles, with QSECOFR and QSYSOPR being the two most frequently used. In fact, only the security officer profile, QSECOFR, or another profile with *SECADM special authority, has the ability to create, change, or delete user profiles.

QSYSOPR is the name of the IBM-supplied system operator profile, and is therefore the name of a user who can sign on to the IBM i system. We can sign in as QSYSOPR whenever we need to perform system operator tasks, such as backups and restores, or powering down the system.

If the IBM i system has just been installed, we can sign in with the user profile QSECOFR, and enter the preset password for that profile, which is likewise QSECOFR.

Signing on starts an interactive job. An interactive job involves real-time processing that requires a dialog between users and programs. In contrast, a batch job runs in the background, does not require user intervention, and often takes a long time to run.

Wanting to get the most out of your IBM i investment? Take a look at www.laservault.com, the friendly IBM backup solution.
Signing on to an IBM i

Displaying Subsystem Descriptions

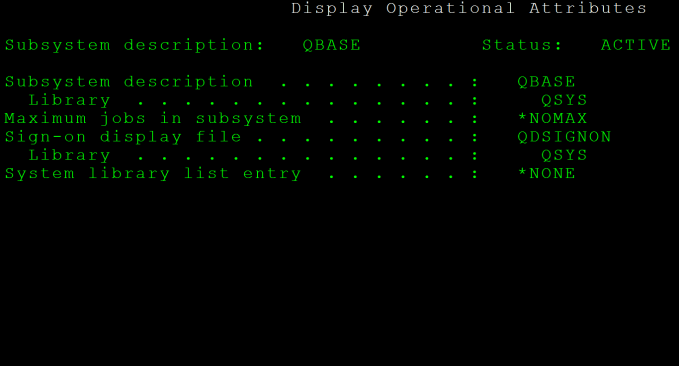
We can use the Display Subsystem Description command, DSPSBSD, to display the information specified in a subsystem description. IBM i systems are shipped with QBASE as the controlling subsystem. To view the description for the QBASE subsystem, enter the command DSPSBSD SBSD(QBASE). A menu is then displayed listing various facets of the subsystem description object.

Option 1 displays the subsystem attributes, which provide the general definition of the subsystem, including its name and the maximum number of jobs allowed in the subsystem. The QBASE subsystem, for instance, will have *NOMAX specified for the the maximum number of jobs, and will be located in the QSYS library.

Screenshot (281)

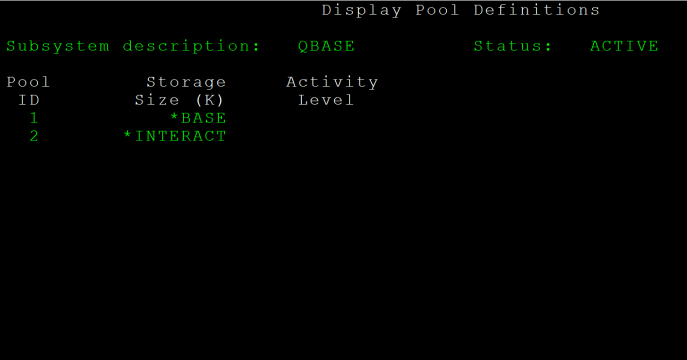
Selecting option 2 displays the storage pool definitions. Main memory is divided into storage pools that are identified by a name or a pool ID. A subsystem’s storage pool definition defines how the subsystem uses memory for processing work. A subsystem can either share an existing pool with other subsystems, establish a private pool, or both. As many as 64 storage pools can be active at one time.

There are four shared shared storage pools predefined and pre-allocated by IBM; these are, *MACHINE, *BASE, *INTERACT, and *SPOOL. The *MACHINE special shared storage pool is used by the IBM i for system jobs. The *BASE special shared storage pool is the default shared storage pool that contains all non-used memory. The *INTERACT storage pool is used for interactive jobs; this is the second default shared storage pool for jobs in the QINTER subsystem.. The *SPOOL special shared storage pool is used for spool related jobs; this is the second default shared storage pool for jobs running in the QSPL subsystem.

Screenshot (282)

We can view the space allocation and performance parameters for the system’s shared pools on the Work with Shared Pools screen. To view the Work with Shared Pools screen, enter the Work with Shared Pools command, WRKSHRPOOL. The Work with Shared Pools screen lists the system’s shared pools, including the four special shared pools, *MACHINE, *BASE, *INTERACT, and *SPOOL. From this screen, we can adjust the amount of space given to each pool, excepting *BASE, which contains all unallocated space, with a minimum size defined by the system value QBASPOOL.

Selecting option 3 displays the autostart job entries for the subsystem. Autostart job entries let us predefine any jobs we want to start automatically when the subsystem starts.

Options 4 and 5 display the workstation entries associated with the subsystem. A workstation entry delineates how a user gains access to the subsystem using a workstation.

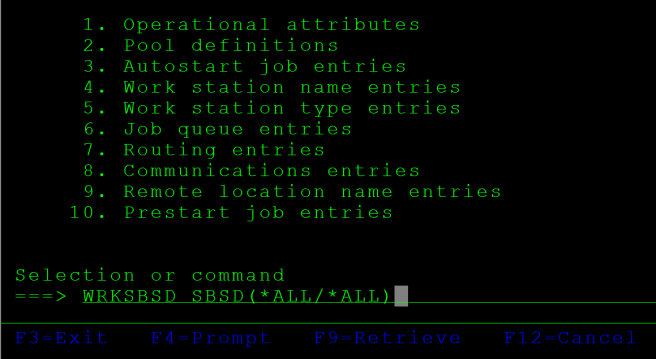
The Work with Subsystem Description command, WRKSBSD, displays a list of subsystem descriptions and allows us to modify, start, stop, and delete subsystem descriptions. To present a list of all subsystems in existence, enter the command WRKSBSD SBSD(*ALL/*ALL).

Screenshot (283)

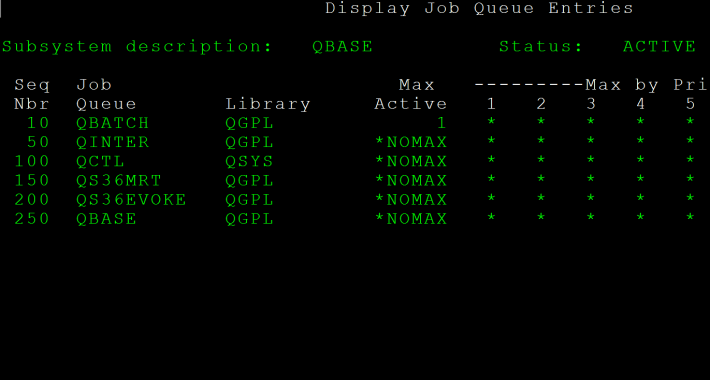
Option 6 displays the job queue entries, which define the specific job queues from which to receive work. A job queue is an object that holds job in a line until a subsystem is ready to run them. If we enter 6 here. we can see that QBASE has, among others, the job queue QBATCH, which is the most commonly used job queue.  On the list of job queue entries  the first column is marked Seq Nbr; this column contains the sequence number used to determine the order of selection among all job queues. We can also see a column marked Max Active; this value controls the number of jobs that can be initiated, when *NOMAX is used, there is no limit to the number of jobs. The default value of 1 that we see for QBATCH states that QBASE will initiate only one job from the job queue, waiting until an initiated job completes before initiating another one.

Screenshot (284)

We can select option 7 to display the routing entries. A routing entry identifies which program to call to control routing steps that will execute in the subsystem for a specified job. To execute in a subsystem, jobs must have routing data.

Option 8 displays the communications entries that enable the subsystem to process program start requests. If there are no communications entries, the system rejects any program start request. The first column listed specifies the the particular device or device type needed for communications. The second column defines specific communications boundaries and variables. The third column specifies the job description to associate with the entry. The fifth column specifies the default user for the communications entry. The last column indicates the maximum number of program start requests that can be active at any time in the subsystem for this communications entry.

Entering option 10 takes us to the Display Prestart Job Entries screen. A prestart job entry tells the subsystem which program to start when the subsystem itself is started. We can enter 5 next to any of the listed prestart job entries to display details about the entry. Note that the prestart job entry indicates a program to be initialized, but the program is not actually executed until it receives a start request.

Wanting to get the most out of your IBM i investment? Take a look at www.laservault.com, the friendly IBM backup solution.
Displaying Subsystem Descriptions

Working with Security System Values

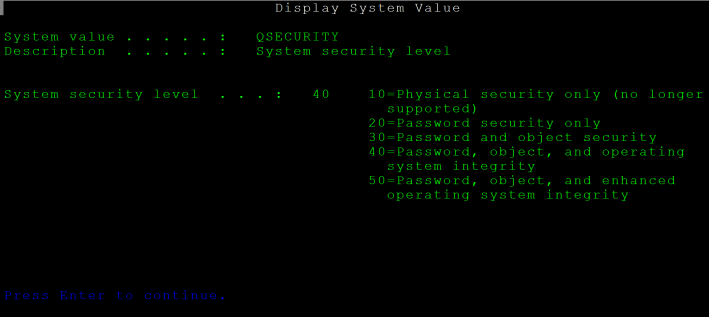
The System Security Level value, QSECURITY, specifies the level of security to be enforced on the system. To display the system’s current security level, issue the command DSPSYSVAL SYSVAL(QSECURITY).

Screenshot (278)

The IBM i currently supports four levels of security; in order of increasing security, these levels are 20, 30, 40, and 50. By default, an IBM i has the security level set at 40. The 40 level is arguably the optimum security level, as it is sufficient for most routine uses of the IBM i system.

The are few substantial differences between level 40 and level 50, the highest level of security. Level 50 was originally implemented by IBM to enable the system to comply with the Department of Defense C2 requirements. The chief difference between levels 40 and 50 is that at level 50 the system validates parameters.

Security level 20 is the lowest possible security level we can set on the IBM i. Security level 20 allows us to control who can sign on to the system, and that’s about it. By default, resource security is not implemented at level 20. When there is no resource security, any user who can sign onto the system has authority to all objects and therefore modify or delete any object.

Security level 30 implements resource security, which allows objects to be accessed only by users who have authority to them. At level 30 and above, users do not receive *ALLOBJ authority by default, meaning that when a user requests an object, multiple levels of object authority go into effect. Only a limited number of users should have all object authority to the system. Typically, *ALLOBJ authority is limited to the system security profile, QSECOFR, and perhaps a few other security profiles.

Security levels 40 and 50 add operating system integrity authority. Security is strengthened at level 40 and above chiefly by preventing restoration of invalid or modified programs, validating job initiation authority, and by providing program states and object domains. At levels 40 and 50 users are prevented from accessing system objects, such as internal programs.

Again, security level 40 is adequate for most purposes. Security level 30 should be considered the bare minimum.

To change the system security level to 30, type in the command CHGSYSVAL SYSVAL(QSECURITY) VALUE(’30’). Note that the level number is enclosed in single quotes. To alter the QSECURITY system value, we must be logged in as a user who has both *ALLOBJ and *SECADM special authority.

Any change to the QSECURITY value will only take effect after performing an IPL of the system. To perform an IPL, issue the command PWRDWNSYS RESTART(*YES). When IPL completes, the system will be running under the new security level.

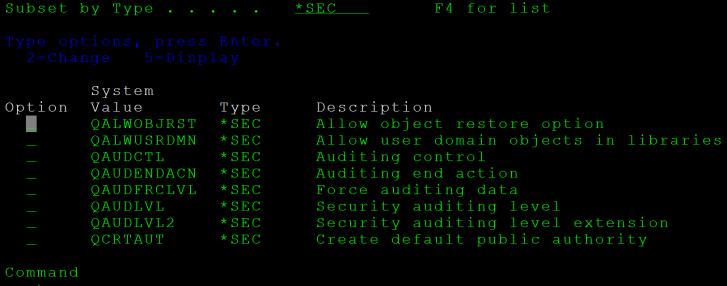
To display all of system security values, enter the command WRKSYSVAL *SEC. The *SEC values are a group of system values used to define global security settings.

Screenshot (279)

As an example of another *SEC system value, QDSPSGNINP controls the display of user sign on information; this value can be set to either 1 or 0. A value of 1 causes the system to display the Display Sign on Information screen, which includes the number of failed login attempts and the last date and time of a successful login. By default this value is set to 0. To view the current setting for QDSPSGNINP, issue the command DSPSYSVAL SYSVAL(QDSPSGNINP).

Wanting to get the most out of your IBM i investment? Take a look at www.laservault.com, the friendly IBM backup solution.
Working with Security System Values

Working with Date and Time System Values

The date and time values, *DATTIM, lets us view, set, and change the date and time the system stores and makes available to applications and utilities.

The system value that hold the current date for the system is QDATE. The QDATE value includes the day, month, and year. To see the current date on the system, run the command DSPSYSVAL SYSVAL(QDATE). The day, month, and year are set individually by the subvalues QDAY, QMONTH, and QYEAR, respectively. We can also view what century the IBM i platform thinks it is via the QCENTURY system value.

Screenshot (132)

The current time of day is stored in the QTIME system value. Time can be further divided into QHOUR, QMINUTE, and QSECOND. The current system time as an offset of Coordinated Universal Time (UTC) is set in the system value QUTCOFFSET.

The system date and time are stored in the value QDATETIME. To see both the current date and time, run the command DSPSYSVAL SYSVAL(QDATETIME).

The day of the week is defined by the system value QDAYOFWEEK; therefore, to see what day of the week it is, we would issue the command DSPSYSVAL SYSVAL(QDAYOFWEEK). The days of the week are indicated by the special values *SUN, *MON, *TUE, *WED, *THU, *FRI, and *SAT.

We can change the date and time system values using the CHGSYSVAL command, for which we need to specify two parameters, the first being the name of the system value we wish to change, and the second being the value we wish to change it to. To change the current year on the system, we would issue the command CHGSYSVAL SYSVAL(QYEAR) followed by the VALUE parameter, and the year we wish to set QYEAR to. For example, we could travel into the future by setting the date to the year 2042 by issuing the command CHGSYSVAL SYSVAL(QYEAR) VALUE(’42’). Note that we place the year value in single quotation marks. So, to change the date to April 21, 2015, we would issue the command CHGSYSVAL SYSVAL(QDATE) VALUE(‘042115’). Note again that we place the date value in single quotation marks.

We can modify the entire date at once by changing the system value QDATE. However, before changing QDATE using the CHGSYSVAL command, we should check the Date Format system value, QDATFMT. The QDATFMT system value determines the format in which a date can be specified. To view the date format, let’s issue the command DSPSYSVAL SYSVAL(QDATFMT). In the United States and outlying territories, this value will be MDY, indicating that the date format is month, day, and then year. To set the format to day, month, year, we issue the command CHGSYSVAL SYSVAL(QDATFMT) VALUE(DMY).

The system time is stored in QTIME and related subvalues. We can change the time to 5 PM, for instance, by issuing the command CHGSYSVAL SYSVAL(QHOUR) VALUE(‘17’). We should note well that the system value for time is set in 24-hour increments. The QTIME system value is six characters in length, and follows the format hours-minutes-seconds. Therefore, if we wanted to change the time to 5:20 in the morning, we would issue the command CHGSYSVAL SYSVAL(QTIME) VALUE(‘052000’).

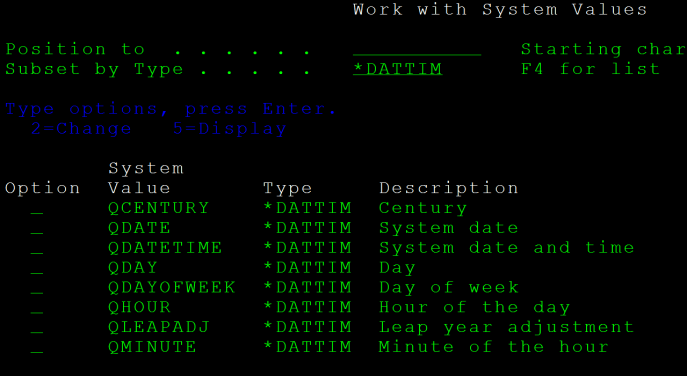
Finally, we can always list all of the system values by entering the Work with System Value command,  WRKSYSVAL, at the prompt. Entering the command WRKSYSVAL SYSVAL(*DATTIM) will list all of the date and time system values.

Screenshot (133)
Want to get the most out of your IBM i system? Take a look at LaserVault, the friendly backup solution.

Working with Date and Time System Values

Getting Basic Info for IBM and Third-Party Vendors

When attempting to troubleshoot problems with IBM or third-party vendors, it can often be necessary to provide them with information regarding the machine model number, the processor code, and the serial number. We can access this information via the system control system values.The system control system values consist of values such as the console name for the system, QCONSOLE, and the system’s assistance level, QASTLVL.

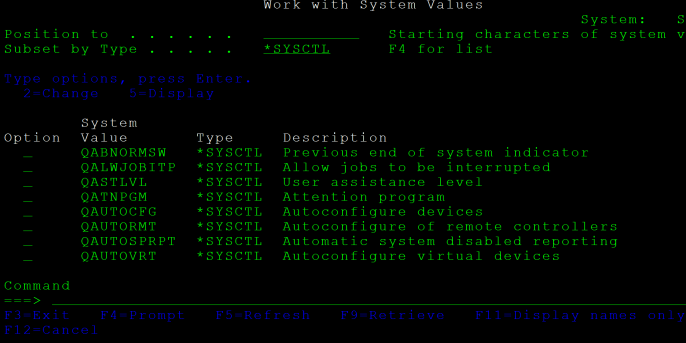
Values of this type can be viewed by issuing the Work with System Values command, WRKSYSVAL. To list the system values, enter the command WRKSYSVAL SYSVAL(*SYSCTL). We are looking for three values in particular; QSRLNBR, the system’s serial number; QMODEL, the system model number; and QPRCFEAT, the system processor feature. In the list of values, under option, designated by Opt,  put the number 5 next to these three values, then hit Enter to display them.

wrksysval

We can, of course, access these system values individually as well by running the Work with System Values command, WRKSYSVAL, and using each of the desired system value names as parameters.

To display the system model number, key the command DSPSYSVAL SYSVAL(QMODEL). The QMODEL system value stores the model number of the system. Although the QMODEL system value is stored in a four-character length field, the value itself is usually three digits.

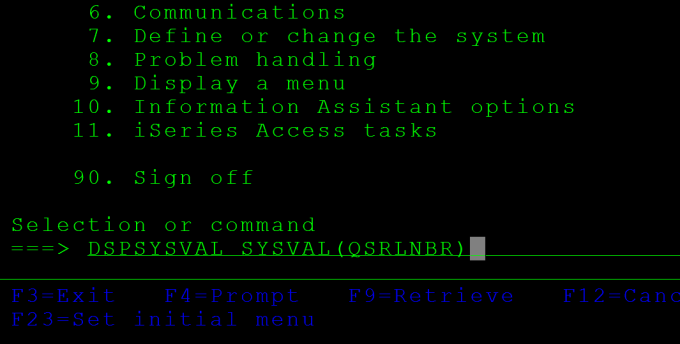
The QSRLNBR system value holds the system’s serial number, which is an alphanumeric code seven characters in length that uniquely identifies the IBM i system. To view the serial number system value, enter the command DSPSYSVAL SYSVAL(QSRLNBR).

dspsysval

The QPRCFEAT system value contains the system’s processor feature code, which is used to identify the processor used on the system. To view the processor feature code for the system, issue the command DSPSYSVAL SYSVAL(QPRCFEAT).

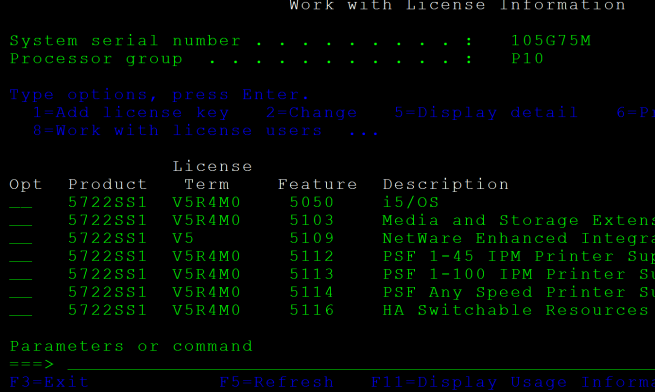
IBM and third-party vendors are also often interested in knowing the system’s serial number and processor group value for licensing purposes. The system serial value, QSRLNBR, and the processor group, which is an IBM designation that loosely groups related processors so as to facilitate tiered pricing, can be accessed by running the Work with License Information command, WRKLICINF. The system serial number and processor group values will be displayed at the top of the screen.

wrklicinf

Interested in getting the most out of your IBM i / iSeries system? Take a look at LaserVault, the friendly backup solution.

Getting Basic Info for IBM and Third-Party Vendors